- 您现在的位置:买卖IC网 > Sheet目录372 > 101-1293 (Rabbit Semiconductor)RCM4510W DEV KIT
�� �
�
�?� SIMPLE3WIRE.C� —This� program� demonstrates� basic� RS-232� serial�
�communication.� Lower� case� characters� are� sent� on� TxC,� and� are�
�received� by� RxD.� The� received� characters� are� converted� to� upper� case�
�and� are� sent� out� on� TxD,� are� received� on� RxC,� and� are� displayed� in� the�
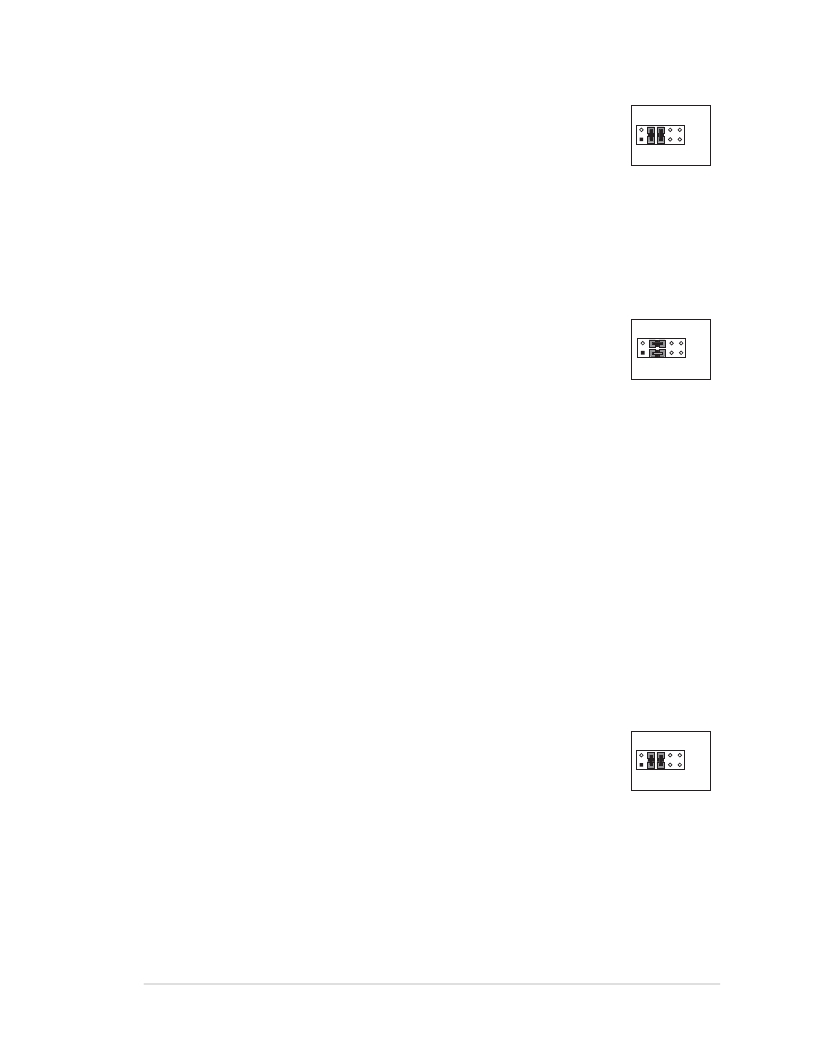
�RxC� TxC�
�TxD� RxD� GND�
�J4�
�Dynamic� C� STDIO� window.�
�To� set� up� the� Prototyping� Board,� you� will� need� to� tie� TxD� and� RxC� together� on� the�
�RS-232� header� at� J4,� and� you� will� also� tie� RxD� and� TxC� together� using� the� jumpers�
�supplied� in� the� Development� Kit� as� shown� in� the� diagram.�
�?� SIMPLE5WIRE.C� —This� program� demonstrates� 5-wire� RS-232� serial� communication�
�with� flow� control� on� Serial� Port� D� and� data� flow� on� Serial� Port� C.�
�To� set� up� the� Prototyping� Board,� you� will� need� to� tie� TxD� and� RxD�
�together� on� the� RS-232� header� at� J4,� and� you� will� also� tie� TxC� and�
�RxC� together� using� the� jumpers� supplied� in� the� Development� Kit� as�
�shown� in� the� diagram.�
�RxC� TxC�
�J4�
�TxD� RxD� GND�
�Once� you� have� compiled� and� run� this� program,� you� can� test� flow� con-�
�trol� by� disconnecting� the� TxD� jumper� from� RxD� while� the� program� is� running.� Charac-�
�ters� will� no� longer� appear� in� the� STDIO� window,� and� will� display� again� once� TxD� is�
�connected� back� to� RxD.�
�If� you� have� two� Prototyping� Boards� with� modules,� run� this� sample� program� on� the�
�sending� board,� then� disconnect� the� programming� cable� and� reset� the� sending� board� so�
�that� the� module� is� operating� in� the� Run� mode.� Connect� TxC,� TxD,� and� GND� on� the�
�sending� board� to� RxC,� RxD,� and� GND� on� the� other� board,� then,� with� the� programming�
�cable� attached� to� the� other� module,� run� the� sample� program.� Once� you� have� compiled�
�and� run� this� program,� you� can� test� flow� control� by� disconnecting� TxD� from� RxD� as�
�before� while� the� program� is� running.� Since� the� J4� header� locations� on� the� two� Prototyping�
�Boards� are� connected� with� wires,� there� are� no� slip-on� jumpers� at� J4� on� either� Prototyping�
�Board.�
�?� SWITCHCHAR.C� —This� program� demonstrates� transmitting� and� then� receiving� an�
�ASCII� string� on� Serial� Ports� C� and� D.� It� also� displays� the� serial� data� received� from� both�
�ports� in� the� STDIO� window.�
�To� set� up� the� Prototyping� Board,� you� will� need� to� tie� TxD� and� RxC�
�together� on� the� RS-232� header� at� J4,� and� you� will� also� tie� RxD� and�
�TxC� together� using� the� jumpers� supplied� in� the� Development� Kit� as�
�shown� in� the� diagram.�
�RxC� TxC�
�TxD� RxD� GND�
�J4�
�Once� you� have� compiled� and� run� this� program,� press� and� release�
�switches� S2� and� S3� on� the� Prototyping� Board.� The� data� sent� between� the� serial� ports�
�will� be� displayed� in� the� STDIO� window.�
�User� ’s� Manual�
�21�
�发布紧急采购,3分钟左右您将得到回复。
相关PDF资料
101-8430-09-203
LED BASE SUBMINI PANEL INDICATOR
103-0537-403
CAP PMI OILTIGHT 1" CLEAR
103-1234-403
CAP LG PANEL IND BLUE OIL TIGHT
103-1336-403
CAP PMI TORPEDO 1" LIGHT YELLOW
103-3101-05-103
LED BASE T-3 1/4 PANEL OIL TIGHT
1032DX5
INDICATOR NEON GREEN PANEL MNT
1033QD5
NEON IND GRN LITE PANEL MNT QC
1034
LAMP INCAND S-8 DBL INDEX VOLT
相关代理商/技术参数
101-1294
功能描述:处理器配件 12VDC POWER SUPPLY REPLACES 101-0686 RoHS:否 制造商:Olimex Ltd. 产品:Cable 用于:
101-1295
功能描述:处理器配件 RCM5600W Antenna Kit
RoHS:否 制造商:Olimex Ltd. 产品:Cable 用于:
10-112989-1
制造商: 功能描述: 制造商:undefined 功能描述:
10112A WAF
制造商:Intersil Corporation 功能描述:
10112-A-0440-2
制造商:Amatom Electronic Hardware 功能描述:
10112-A-0632-2
制造商:Amatom Electronic Hardware 功能描述:
10112-B-0632-6A
制造商:Amatom Electronic Hardware 功能描述:
10-112-BLANK
制造商:Calrad Electronics 功能描述: